
Talking to people who have just installed a standing desk in their home office, one problem is constantly being discussed. It’s not a problem to adjust the height of the desk, but the keyboard is not in the right position. If you raise the desk height to match the monitor to your eye level, your wrist suddenly becomes crooked at an angle, and even if it’s okay for the first 20 minutes, it’s really painful at 3 p.m. Usually by this time, there is a story about a keyboard tray.
I don’t think keyboard trays are essential for all standing desks. I think what really matters is whether the keyboard can be placed at the elbow level while keeping the wrist in a neutral position in line with the forearm. For some people, the top of the desk itself plays its role well enough. On the other hand, for others, trays are the only solution. In this article, let’s take a closer look at the height, slope, size, mounting method, and how the tray works when you sit and stand up repeatedly.. If you haven’t already, it’s worth reading how I set up a comfortable standing desk workspace first, since a lot of this builds on that setup. Finally, let me introduce you to some specific trays worth noting.
What Does a Keyboard Tray Actually Do on a Standing Desk?
Before looking at the product, it’s helpful to understand what the tray actually solves. The keyboard tray is located under the main workbench and supports the keyboard and mouse separately from the space on the desk. There are several useful benefits to this. It allows you to move your monitor height and typing height farther away, actually free up space on your desk, and, most of all — an easy part for people to overlook — pull your keyboard closer to your body without having to reach out to the edge of your desk.
The tray is especially valuable when the desk itself is already at a height suitable for viewing the monitor, but too high for comfortable typing. According to one guideline, the neutral target elbow angle is approximately 90 to 120 degrees [ Read More ]. This range allows some flexibility. That is, people do not have to insist on a single precise number and aim for a range that allows them to remain comfortable without stiffening or stretching their joints excessively.
Do You Really Need a Keyboard Tray With a Standing Desk?
The problem is this. It’s not for everyone, and I’d rather be honest than pretend that all environmental problems are solved with just one tray. In my experience reviewing home office environments, trays are often needed when one or more of the following is true:
- The keyboard is positioned too high when the desk is placed high to work on.
- When typing, they find themselves raising their shoulders unconsciously
- The wrist is bent upward rather than flattened
- The keyboard and mouse are too far away to reach you comfortably
- Your desk feels cluttered with monitor stands, cables, accessories, etc.
- Sitting and standing frequently and repeatedly, never feeling comfortable with a single fixed height
If the desk itself can comfortably place the keyboard at elbow height with the wrist in a neutral position, and the mouse is within easy reach, a keyboard tray may not be needed at all. In fact, the U.S. It is worth considering a keyboard tray when the workbench or chair alone cannot be adjusted enough to hold the right position.
The Right Keyboard Height for Standing and Sitting
This is probably the part I’m going to pay the most attention to, because most of the ergonomic benefits are exercised here.The height of the keyboard should be set to approximately 36 to 46.5 inches on the floor when standing and 22 to 30 inches when sitting, both of which are typically based on elbow height.
I’ll take these figures as a reference range, not as a personal guideline. The actual ideal height depends on your height, desk and keyboard design, whether you wear shoes or not, keyboard thickness, and natural posture. The way that worked when I first started adjusting my work environment was not to guess, but to step by step:
- Don’t adjust your posture to the height of the desk, but stand naturally
- Put your shoulders down and lean back to relax.
- Keep your elbows close to your body
- Raise (or lower) the keyboard to approximately elbow level
- Make sure your wrist stays flat and straight without bending up or down
- Rather than trying to fit your body to the tray, adjust the tray to fit your body
The last point seems natural to write, but it’s the mistake I see most often. Rather than fine-tuning the tray itself, people tend to force their wrists to bend at an unnatural angle because there are only two or three fixed positions on the tray.
Why Keyboard Tray Tilt Matters More Than I First Thought
It’s bound to be focused only on the height, but the slope is also that important, which is what I initially underestimated. The tilt adjusts the angle at which the hand touches the keyboard. Using a tilt-adjustable tray, including a “negative tilt” with a lower front edge than the back, makes it much more flexible to find a neutral wrist position instead of a compromised position.
Let me be honest with you about one fact that many articles about the Best Keyboard Tray overlook. There is no universal tilt angle that is medically correct. You can see many pages online that recommend negative tilts of 10 to 15° or 20° at specific angles, as if they were strict rules.
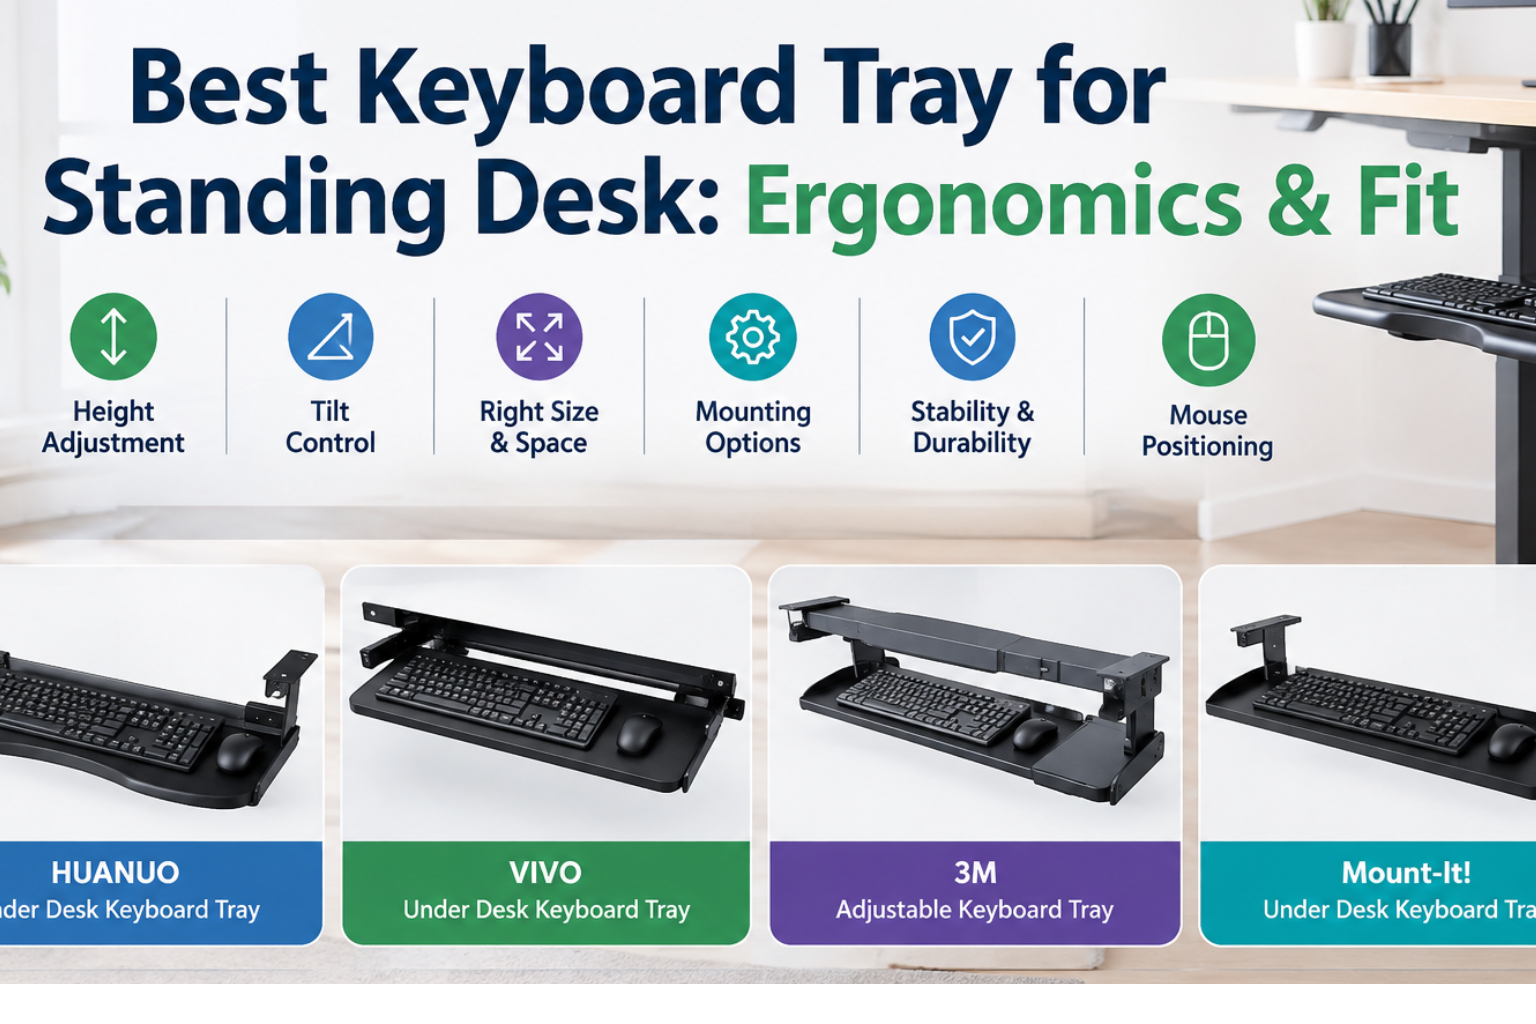
6 Things I’d Check Before Buying a Keyboard Tray
1. Tilt
Find a tray that can adjust the angle, not just one setting. Adjustability is more important than the specific angle shown in the advertisement.
2. Adjust Height
Fixed height trays don’t fit well with a desk that can be used sitting or standing. There must be enough height adjustment range to accommodate both positions, and there must be a locking mechanism that is actually fixed and does not slip.
3. Platform Size
The platform should be comfortable to fit into the keyboard, mouse, mouse pad (if used), and palm rest, if included in the settings. In my experience, the tray is wide and deep enough to accommodate both the keyboard as well as the keyboard and pointing device.
4. Mounting Method
Screw-fixing, clamp, sliding, and bracket designs all have different modes of operation. This can be more complex, especially for electric standing desks. Crossbars, motors, and cable management trays all occupy the bottom space, so it’s a good idea to check the bottom of your desk before ordering.
If you want a deeper dive into desk selection itself, my best ergonomic standing desks roundup covers a lot of this same mounting-and-clearance territory from the desk side rather than the tray side.
5. Stability
The rail structure, how much the tray bends depending on the typing pressure, how smoothly it slides, and the locking mechanism are much more important than the maximum load rating indicated on the box. A strong-looking tray is not necessarily more stable.
6. Mouse Placement
This part is worth mentioning separately. If the platform is not wide enough to hold both the keyboard and the mouse, the mouse is pushed sideways or placed on a regular desk, which again raises the “reach out” problem that the tray has to solve.
Keyboard Trays Worth Considering for a Standing Desk
I organized this list concisely and in detail without making it a vast comprehensive review. The trays introduced here are products that I can actually notice, and each is suitable for slightly different use environments.
HUANUO Under-the-Desk Keyboard Tray
For height control and downward tilt features in an under-the-desk design, this is a great choice. It is especially suitable for standing desk users who need a wide range of movement between sitting and working while standing.
VIVO Keyboard Tray under Desk
A sliding design that makes it simpler and more space-saving. It is suitable for those who do not need much tilt control and prioritize securing space on the desk.
3M adjustable keyboard tray
More traditional adjustable tray design. If you want a proven mounting system with stable tilt and height adjustment, suitable for repeating sitting and standing, it’s worth a look.
Mount-It! Extra Wide Keyboard Tray
This is a very large slide-type option, which is useful when you need to move your mouse too far away from the narrow platform of an existing tray.
It is hard to conclude that any one of these is by far the “best.” In the end, it depends on the amount of space under the desk, the combination of the keyboard and mouse in use, and how often you alternate between sitting and standing.
How I’d Set Up a Keyboard Tray on a Standing Desk
- Adjust the desk height so that the monitor comes comfortably at eye level.
- Place the tray at the elbow level.
- Relax your shoulders and lower them.
- Keep your elbow close to your body.
- Straighten your wrists and keep your forearms in line.
- Keep your mouse close enough not to stretch it sideways.
- Repeat sitting and standing all day, and reposition each time instead of keeping the tray in one place.
The key to this recommendation is to place the keyboard and mouse close together and keep the wrist and arm in a neutral position.
Common Keyboard Tray Mistakes I’d Avoid
Some cases in which people make more than one mistake include the following:
- If you order a tray without measuring the free space under your desk in advance.
- If you choose a tray that is too small to have space next to the keyboard to hold the mouse.
- When using a fixed height tray with a standing desk.
- When Mounting a Tray Does Not Take Into Account the Desk’s Crossbars.
- If you choose only by weight rating without checking the stability of the rail.
- You set the keyboard too high just because it’s faster than adjusting the tray.
- Assume that the negative slope is automatically “more ergonomic” regardless of the position of their wrist.
- If you do not see the cable length, I recommend a minimum of 6 feet of cable for repositioning components as needed
My Final Take
In the end, I would recommend the best keyboard tray for the standing desk is not the most functional product. It’s got enough height adjustability, real tilt adjustability, a wide top to hold both the keyboard and mouse, a solid mounting, and a great fit on the bottom of your desk.
Trays are not necessary. There are many standing desks that work well without a tray. What is actually important is to adjust the height and angle of the keyboard to help keep the wrist in a neutral position and relax the shoulder, and to choose a tray (or without a tray) that makes this possible.

Aamir Riaz is the founder and owner of Bashufy. After years of working with uncomfortable desks and learning the importance of better posture, he shares honest standing desk reviews, buying guides, and ergonomic tips based on research and real user experiences to help readers make better choices for their home office setup.